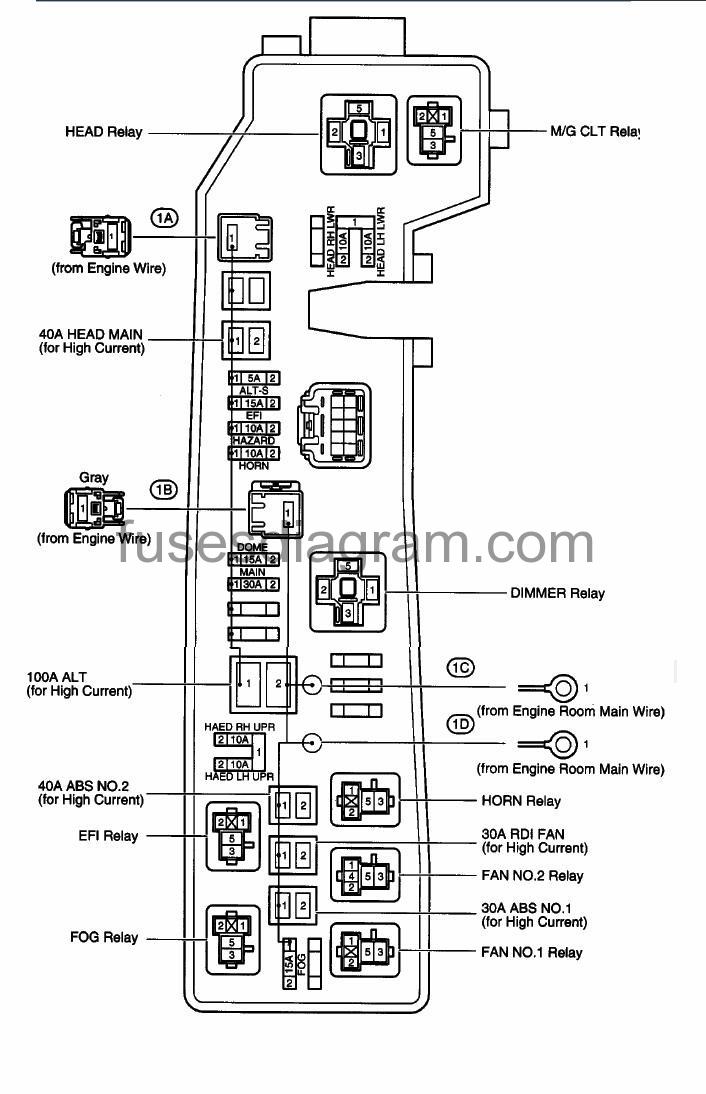
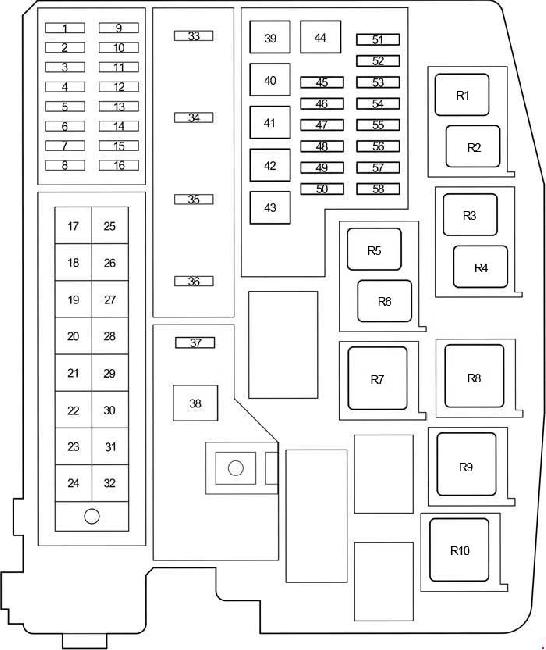
2010 Corolla Fuse Box Diagram
- Category : Box Diagram
- Post Date : January 26, 2026
2010 Corolla Fuse Box Diagram
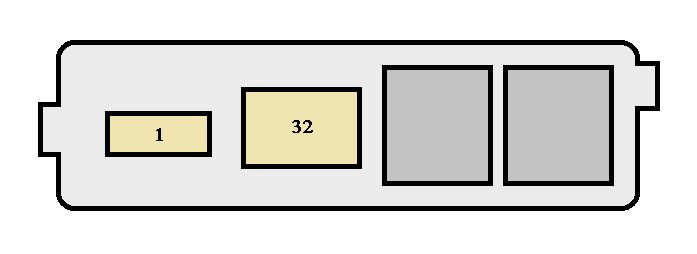
Fuse Box Toyota Corolla E120

Toyota Corolla Ae86 1983 - 1987 - Fuse Box Diagram

1999 Toyota Corolla Fuse Box Diagram

1995
Toyota Corolla 2007 - 2008 - Fuse Box Diagram
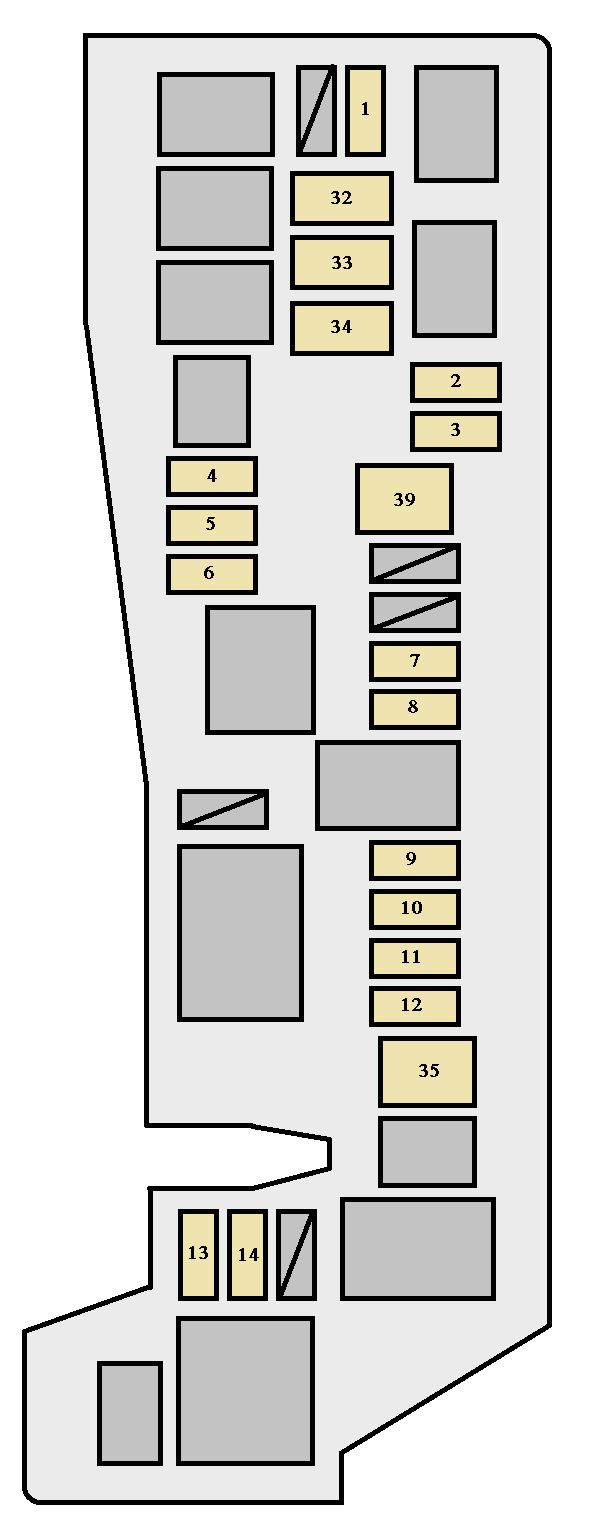
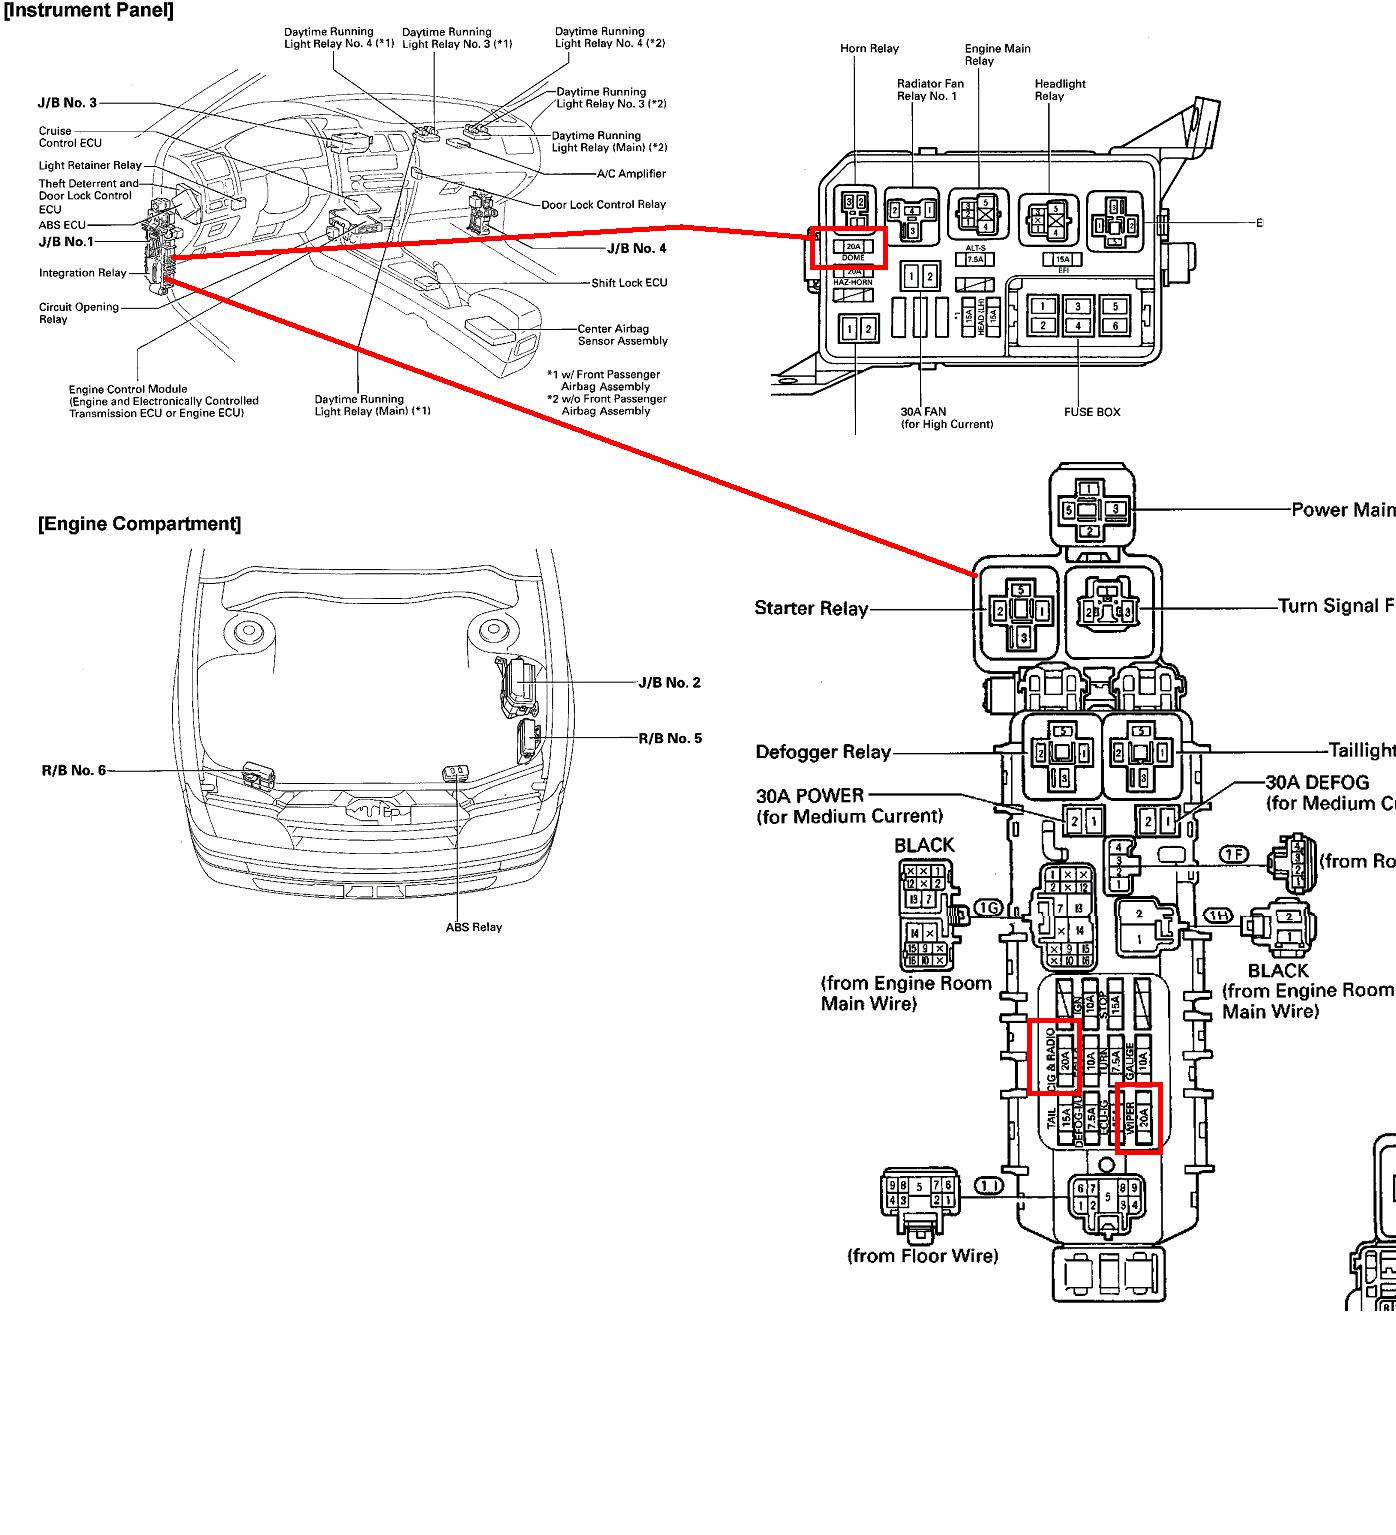
Toyota Corolla 2002 - 2004 - Fuse Box Diagram
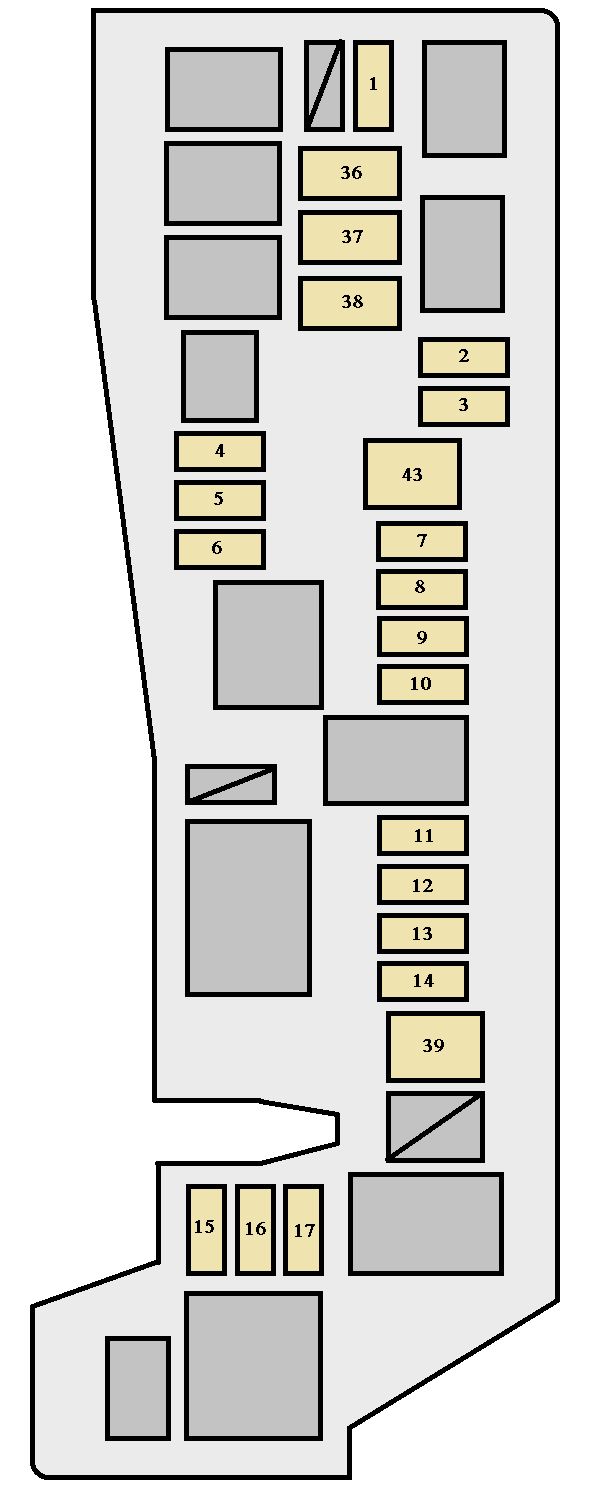
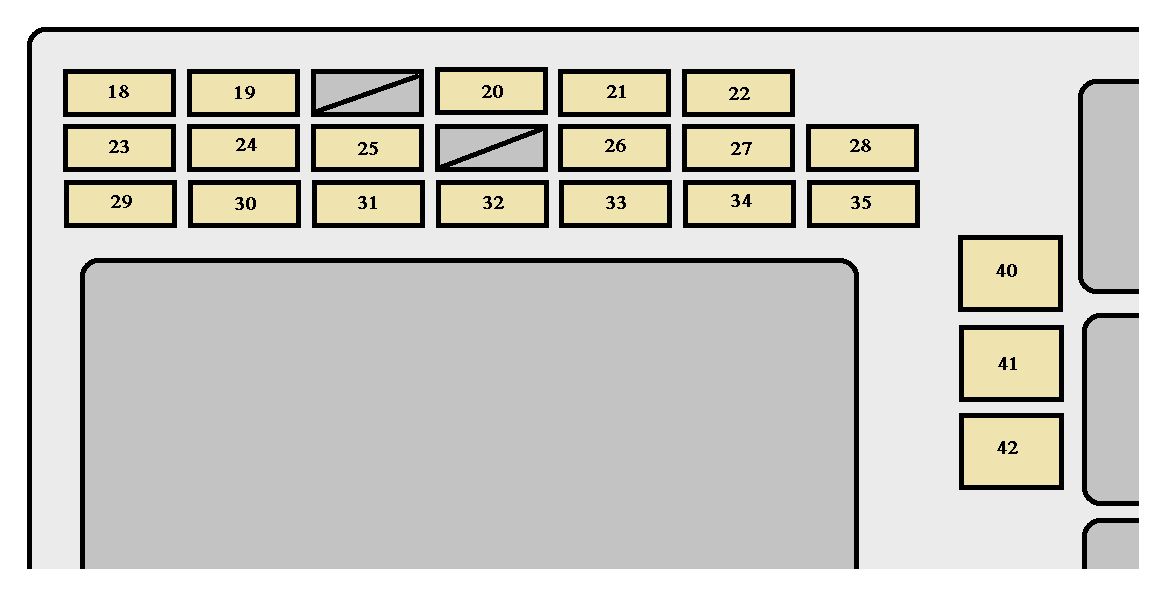
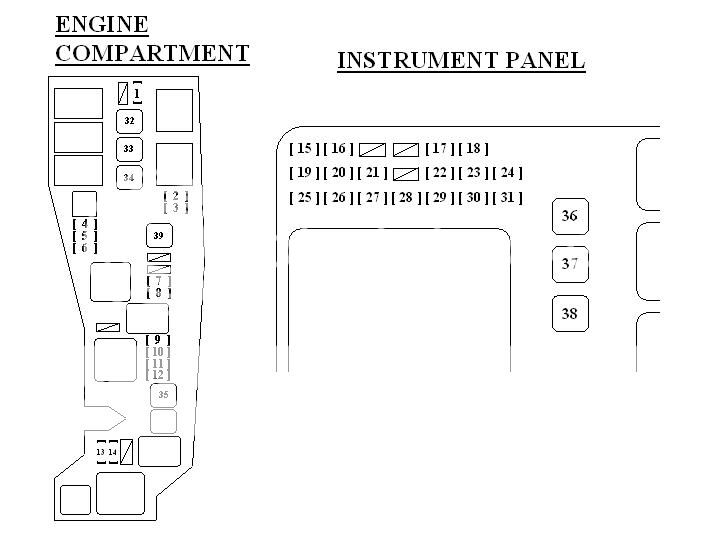
Toyota Corolla 2009 - 2012 - Fuse Box Diagram
Toyota Corolla 2007 - 2008 - Fuse Box Diagram

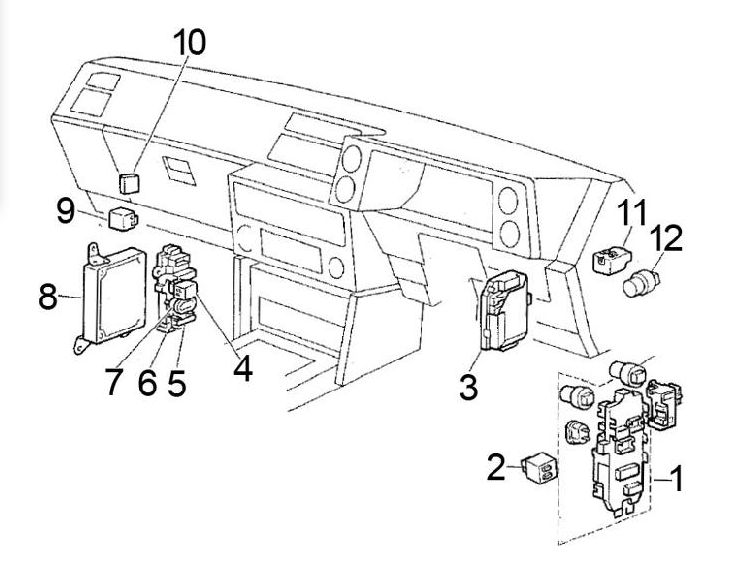
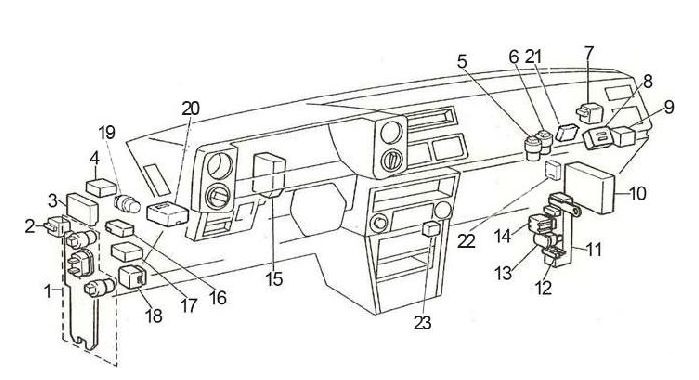
Toyota Corolla 1998 - 2002 - Fuse Box Diagram

2004 Toyota Corolla Radio Clock Stopped Working Cartalk

Fuse Box Toyota Corolla E120
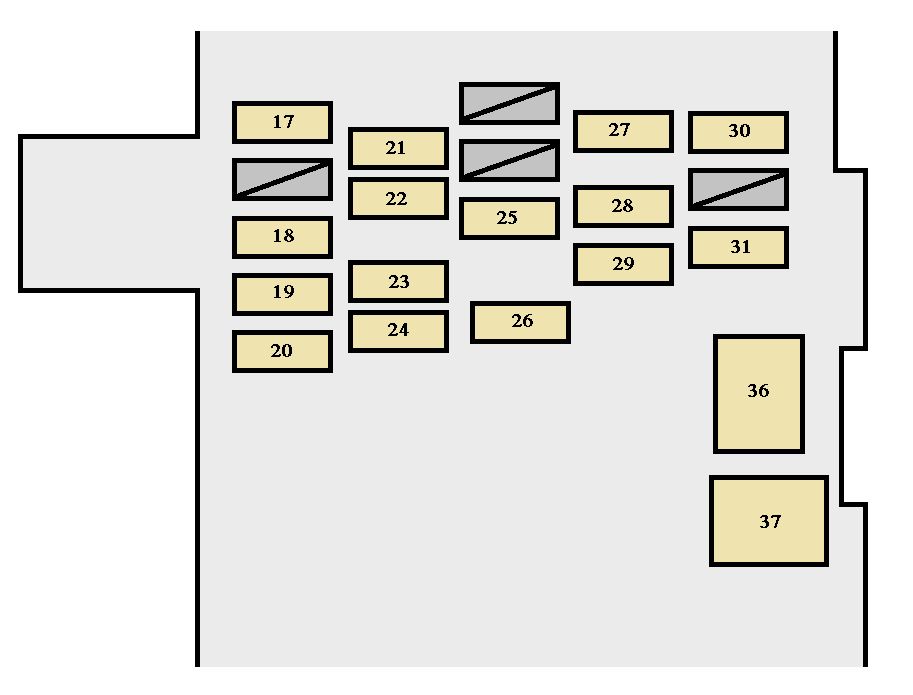
Toyota Corolla 1998 - 2002 - Fuse Box Diagram
2003

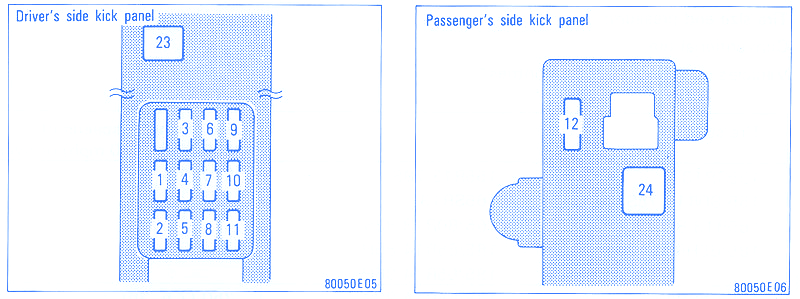
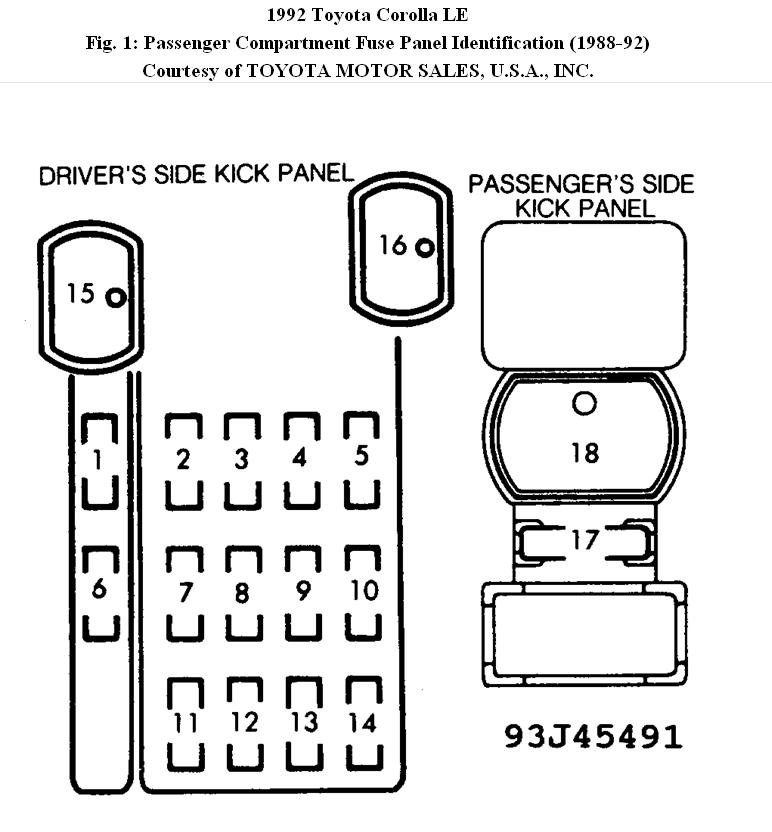
1993 Toyota Corolla Fuse Box Diagram

2004 Toyota Corolla Fuse Box
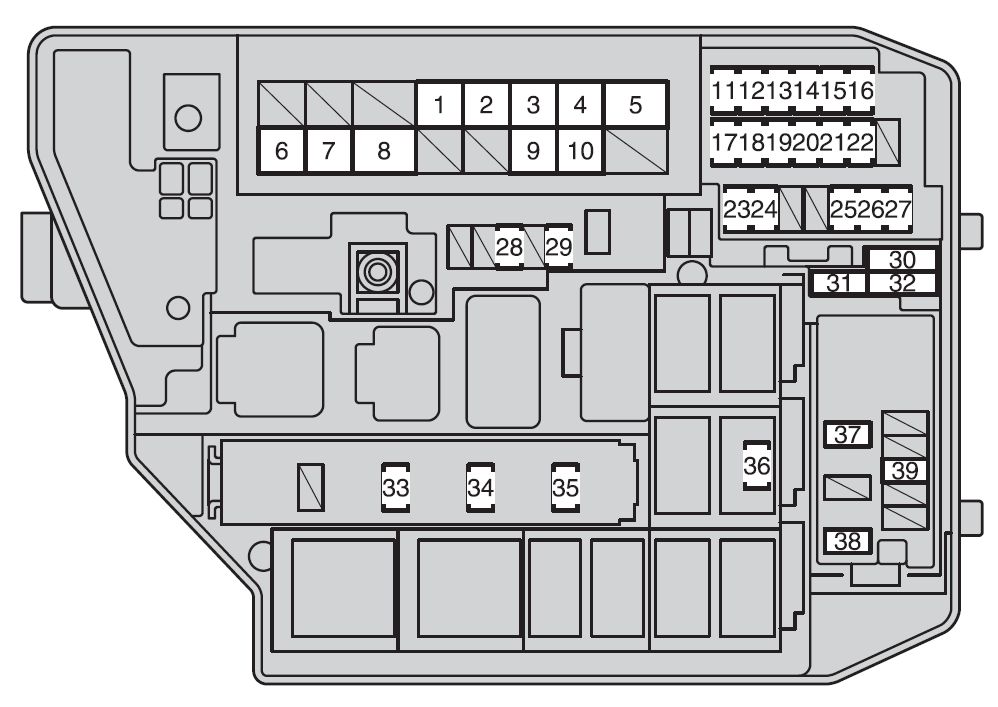
Toyota Corolla 2012 - 2016 - Fuse Box Diagram

2012 Toyota Corolla Fuse Box

1993 Toyota Corolla Fuse Box Diagram

Where Is The Fuses For A 2002 Corolla Ce Windshield Wipers Located

Toyota Avensis Radio Fuse
2006

1993 Toyota Corolla Fuse Box Diagram

1999 Toyota Corolla Engine Diagram
2005 Toyota Corolla Dash Light Fuse
Toyota Corolla Ae86 1983 - 1987 - Fuse Box Diagram

2001 Toyota Camry Interior Fuse Box Diagram

Toyota Corolla
Toyota Corolla 1996 Fuse Box Block Circuit Breaker Diagram U00bb Carfusebox
Toyota Corolla 1998 - 2002 - Fuse Box Diagram
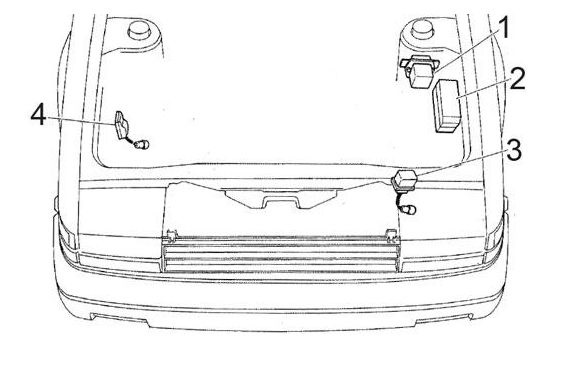
1990 Toyota Corolla Starter Motor Location

1996 Corolla Fuse Box

1999 Toyota Corolla Fuse Box Diagram
Toyota Corolla Ae86 1983 - 1987 - Fuse Box Diagram
Toyota Corolla Ae86 1983 - 1987 - Fuse Box Diagram
Toyota Corolla Ae86 1983 - 1987 - Fuse Box Diagram
Fuses U0026 Relay Location I Have A 1992 Toyota Corolla Le And Im
Diagram 2010 Corolla Fuse Box Diagram
Download 2010 Corolla Fuse Box Diagram
This post describes how to take pictures of stars with your DSLR camera. I'll cover the basic camera settings, and what to expect your first time out.
Learn how to set up your DSLR for star photography with easy tips on camera settings, gear, and techniques to capture stunning night skies and the Milky Way.
The best method is to match the brightness of your photos to the landscape and stars you’re looking at. The camera picks up much more data than is actually displayed on the preview screen.
In this article, we’ll discuss the ideal star photography settings for DSLR and mirrorless cameras. Note: The following information is from our workshop, Photographing the Milky Way. It also includes tons more information, from which lenses are the best for nightscape photography, to the post production workflow of editing milky way photos.
If you're a complete beginner, we'll show you how to take and process your very first astrophoto with a DSLR. After that, you can experiment with settings and composition to make your photos even better.
Press your remote shutter release or use your camera's built in timer to take the photo. Check your camera’s display screen to review the image. Look at the exposure and sharpness of the stars. Adjust your settings if needed and try again. Even the best night shots can benefit from some editing.
A beginner astrophotography quickstart: tripod tracker EQ paths, ASIAIR vs PC control, capture basics, stacking, processing options, and first targets.
For the best results, the settings you need to be able to change are the shutter speed and the ISO, and it is good if you can also adjust the aperture. You don’t need a high end DSLR for night sky photography, and you can in fact take pictures of stars with a smartphone if you are so inclined.
In this guide, we will walk you through the essential steps to help you take stunning pictures of stars and the Milky Way. Whether you’re a beginner looking to dip your toes into astrophotography or a seasoned photographer wanting to enhance your skills, capturing stars with your DSLR camera can open up a whole new world of creativity and wonder.
To attach to the camera, you will need to use a lens with: A wide angle is indicated by a low focal length in millimeters, for example, 14mm. Anything from 8mm to 35mm could be considered “wide” and work for star photography. Some even have great results with 50mm lenses.
3 way switch,3 way switch wiring,3 way switch wiring diagram pdf,3 way wiring diagram,3way switch wiring diagram,4 prong dryer outlet wiring diagram,4 prong trailer wiring diagram,6 way trailer wiring diagram,7 pin trailer wiring diagram with brakes,7 pin wiring diagram,alternator wiring diagram,amp wiring diagram,automotive lighting,cable harness,chevrolet,diagram,dodge,doorbell wiring diagram,ecobee wiring diagram,electric motor,electrical connector,electrical wiring,electrical wiring diagram,ford,fuse,honeywell thermostat wiring diagram,ignition system,kenwood car stereo wiring diagram,light switch wiring diagram,lighting,motor wiring diagram,nest doorbell wiring diagram,nest hello wiring diagram,nest labs,nest thermostat,nest thermostat wiring diagram,phone connector,pin,pioneer wiring diagram,plug wiring diagram,pump,radio,radio wiring diagram,relay,relay wiring diagram,resistor,rj45 wiring diagram,schematic,semi-trailer truck,sensor,seven pin trailer wiring diagram,speaker wiring diagram,starter wiring diagram,stereo wiring diagram,stereophonic sound,strat wiring diagram,switch,switch wiring diagram,telecaster wiring diagram,thermostat wiring,thermostat wiring diagram,trailer brake controller,trailer plug wiring diagram,trailer wiring diagram,user guide,wire,wire diagram,wiring diagram,wiring diagram 3 way switch,wiring harness
